


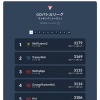


Raid Counters
Added the Max Move Boost (Lv+1), which is the field effect of Eternatus, to the conditions for Max Battles.
| Boss Side Conditions | |
Boss Name Raid Max Battle | |
Raid Lv Raid Raid Max Battle Max Battle1234567 | |
| Player Side Conditions | |
Mega Boost Mega / Primal Clear                  | |
| Order | PL |
State  Unreleased Unreleased |
| Reset |


 1
1


You can view the top 50 counter Pokémon for raid bosses, ranked by fastest clear time under various conditions. The system simulates actual battle scenarios to calculate average performance, making it useful for solo raids and time attack strategies.
Results (DPS & TDO)
| Graph | This graph plots DPS (Damage Per Second) against Total Damage Output. The higher a Pokémon appears toward the upper-right corner, the better its overall performance. |
| DPS | DPS indicates how much damage a Pokémon deals per second and serves as a key metric for selecting raid counters. On this site, DPS is calculated by simulating real battle flows, including the time taken to switch to the next Pokémon after one faints. This approach fully reflects survivability and provides a comprehensive measure of performance in raids. |
| TDO | TDO shows the total amount of damage dealt by a Pokémon before it faints. Since the DPS already reflects survivability, it's generally best to sort by DPS even if the TDO is lower. However, in battles where your team may faint due to a small number of players — but you don't want to rejoin from the lobby — using high-TDO Pokémon can help avoid total party wipeouts. Because such outcomes can’t be predicted with certainty, it is reasonable to place a high-TDO Pokémon at the end of your team as a backup. |
| TTL | This indicates how long a Pokémon can stay alive in battle. It can be useful for estimating battle flow or for players who want to conserve healing items. |
Results (TTW & Death)
| Graph | This graph plots Time to Win against the Number of Pokémon Needed per Player. The lower-left area indicates better performance. The initial view shows results based on the minimum number of players required to defeat the boss. You can adjust the number of players at the top of the chart. |
| TTW | This represents the time it would take to defeat the boss using an infinite supply of the same Pokémon, with no time limit. Dividing this by the number of players gives the actual raid duration for the full team. (*See Note 2) |
| Deaths | This shows the total number of counter Pokémon required to complete the raid under the above conditions. Dividing by the number of players gives the required number per player. |
| Charged Moves Used | The average number of charged moves each Pokémon can use before fainting. |
| Max DPS | The highest DPS recorded among 10 simulation runs. If multiple enemy movesets are possible, the value shown is the average of the best-performing cases. This is not a theoretical maximum, but is close to the peak performance achievable. |
※ About the Initial Number of Players
The displayed number is calculated automatically: it's the minimum number of players required for the fastest-DPS-only team to defeat the boss within the time limit.
If the result is very close to the time limit, whether the raid is realistically possible depends on factors such as whether players need to return to the lobby. Please make that judgment separately.
※2 About Time to Win
- The time shown is an average estimate. Since actual battles vary depending on move timing and flow, the real-time result may be faster or slower.
- In Pokémon GO raids, known bugs such as unregistered damage or time rollbacks—especially during long battles—may cause the actual time to be slightly longer than the simulation.
- If your team faints and you have to return to the lobby, that time should be added separately.
Breakpoint (Damage Dealt)
By selecting the move name of a counter Pokémon in the results section, you can view the breakpoint for that move.
A breakpoint is a table that shows the damage dealt by a move based on the Pokémon's level and attack IV.
Background colors are applied to higher damage values, making it easy to identify when a small change in stats results in increased damage.
Breakpoint (Damage Taken)
Similarly, you can check how much damage a Pokémon takes from a specific move based on its level and defense IV.
Breakpoint (CP Check)
By enabling the "Show CP" option, you can view the CP and required XL Candy for each Pokémon level and IV value in the breakpoint table.
How Counter Pokémon Are Calculated
In actual battles, a Pokémon’s performance—such as DPS and the number of charged moves used—can vary depending on how the fight unfolds.
This is especially influenced by the enemy’s move set and when they use their charged moves. For example, being hit with a charged move early can cause a Pokémon to faint faster, while in other scenarios it may survive longer and deal more damage.
This counter list is based on simulations using multiple battle flow patterns, where the timing of the enemy’s charged moves is varied to reflect realistic conditions.
We simulate 10 different patterns for each scenario, based on whether the counter Pokémon is sent out first (typically receives fast moves for a while), or as a backup (possibly getting hit by a charged move immediately).
These patterns cover cases where the enemy uses charged moves frequently, infrequently, immediately, or after a delay—representing a wide range of possible real-world battle situations. Weighted averages are then calculated based on these simulations.
If multiple enemy move sets are selected, the tool runs separate simulations for every combination of selected fast and charged moves, and the results are averaged.


