


GO Map: User Guide
| How to Use the Shared Map | |||
|---|---|---|---|
| Top | Map Display Toggle | Sharable Information | Useful Features |
| About GO Raids Level | PUSH Notifications | Supported OS & Browsers | Reports & Fraud Prevention |
| User Registration | Contact Us | ||
Contents
| GO Raids App | |
|---|---|
| The app version does not have a URL bar, so the map can be displayed larger than the web version. *Tip for iOS: Swipe right from the left edge to return to the previous screen.* | |
 |  |
How to Use the Map
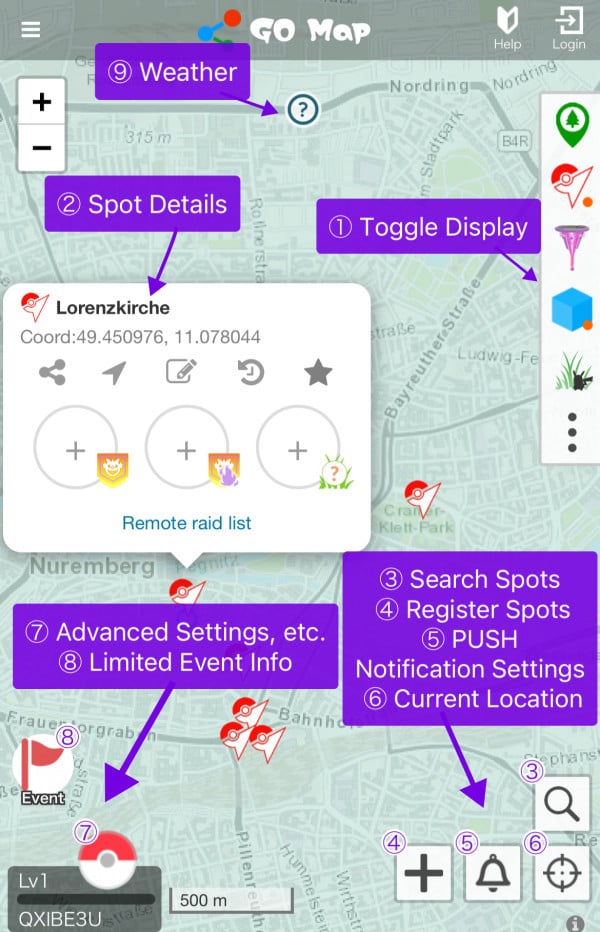
① Toggle Display
By turning the icons in the top right of the map On/Off, you can switch the information displayed on the map.
| Top Right Toggle Icons | ||
|---|---|---|
 Nest Show all |  Nest With nest info |  Nest Hidden |
 Gym Show all |  Gym With raid info |  Gym Hidden |
 Power Spot Shown |  Power Spot Hidden | |
 PokéStop Show all |  PokéStop With task info |  PokéStop Hidden |
 Wild Spawn Shown |  Wild Spawn Hidden | |
② Spot Details
When you select an icon on the map (PokéStop , Gym
, Gym , Power Spot
 , Nest
 ), a balloon will appear showing information related to that spot.
Spot Existence Info
Displays the existence information for the spot (name, label, etc.). If the information is incorrect, you can fix it with the “Edit” button .
※Edits may be reverted if there is an issue.
Edit spot info
Current Spawn Info
You can view and register info about field research, raids, nests, etc. currently appearing at the spot.
View and register spot details
Useful Functions
Features to make spot info more convenient, such as favoriting gyms or checking completed tasks and raids.
Useful functions
③ Search Spots
By tapping the “Magnifying Glass Icon” in the bottom right, you can search for gyms, PokéStops, power spots, and nests within a 10 km radius.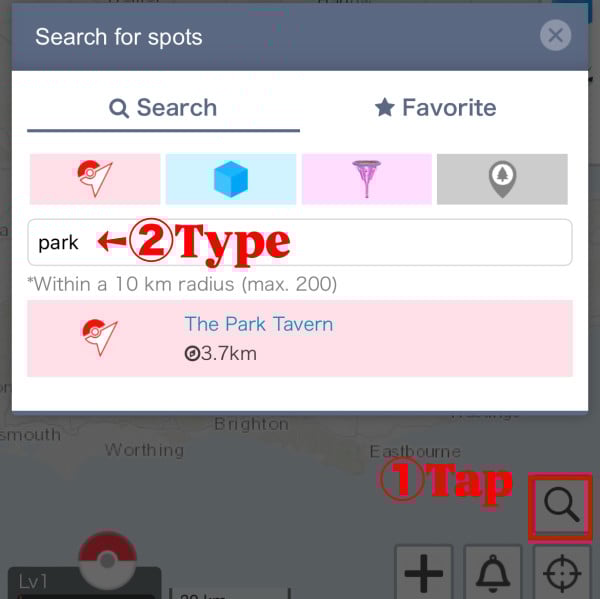
④ Register Spots
You can newly register Pokémon GO spot info (Gyms, PokéStops, Power Spots), wild spawns, and nests. You can also register current raid info in bulk or announce Golden Lure installations.
For details, see here.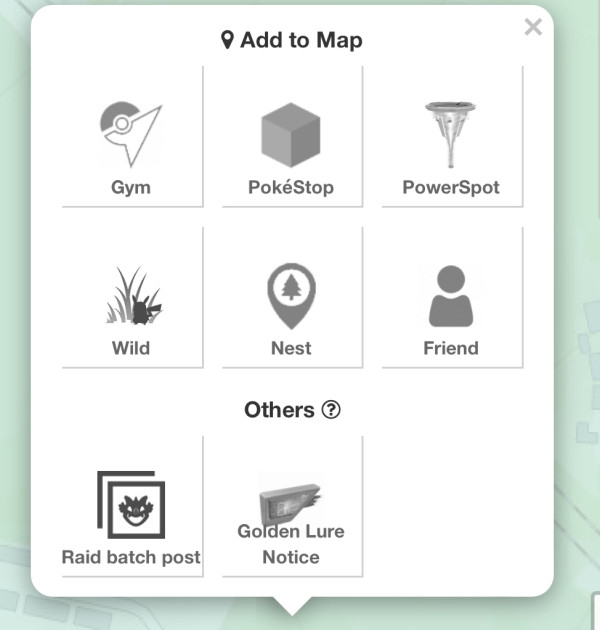
⑤ PUSH Notification Settings
Configure the push notifications sent from the shared map.
For details, see here.
⑥ Current Location
Tap the “Current Location Icon” in the bottom right to activate GPS Auto-Tracking Mode (an orange border will appear).
In this mode, your current location will always be centered on the map, and spot info like gyms and PokéStops will be automatically fetched as you move a certain distance. The auto-tracking mode will be disabled if you manually move the map.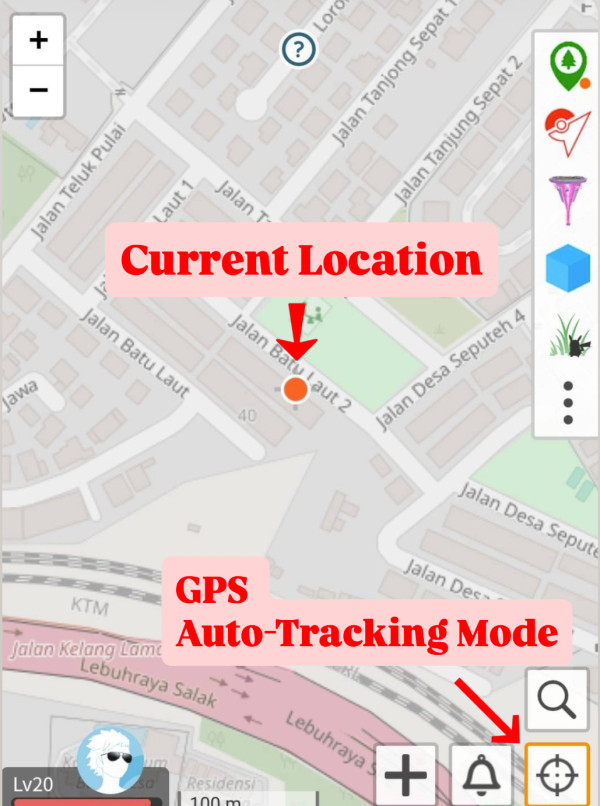
⑦ Advanced Settings, etc.
Advanced Settings
Select the “Profile Icon → Settings Tab” in the bottom left to configure advanced map settings.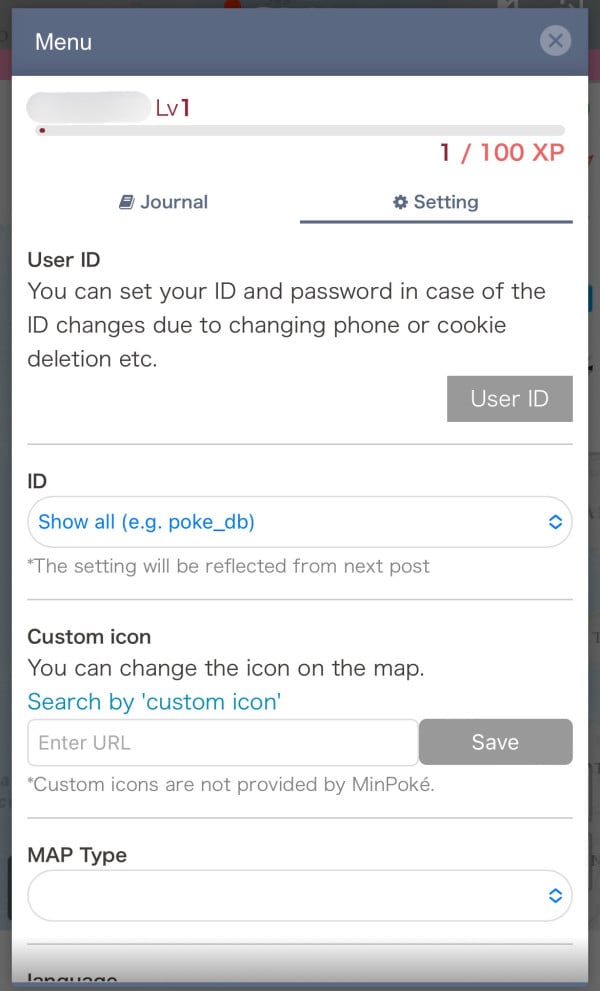
| ID | Choose to display your ID: “Show all,” “Show head,” or “Hide all.” |
| Custom Icon | Specify the URL for Pokémon images to display on the map. *For details, see here* |
| MAP Type | Select the type of map to display. |
| Language | Select the display language: Japanese or English. |
Journal
You can check your posting history by selecting the “Profile Icon” in the bottom left and opening the “Journal.”
In the Journal, you can see your posting history and the number of posts by category.
If you want to see the posting history of other users by spot, see here.
⑧ Limited Event Info
During Community Days, Research Days, or paid events, a button will appear in the bottom left to toggle between normal and event-specific tasks.
| Event Filter | |
|---|---|
 | Show tasks during Community Day or Research Day |
 | Show tasks and raids during paid events |
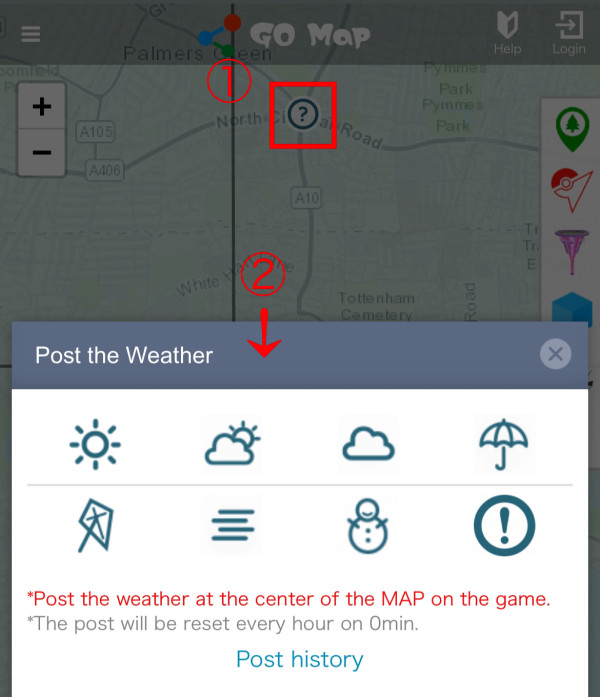
⑨ Weather
Displays and registers in-game Pokémon GO weather conditions.
※Weather is divided by Lv10 S2 Cells and resets every hour on the hour.
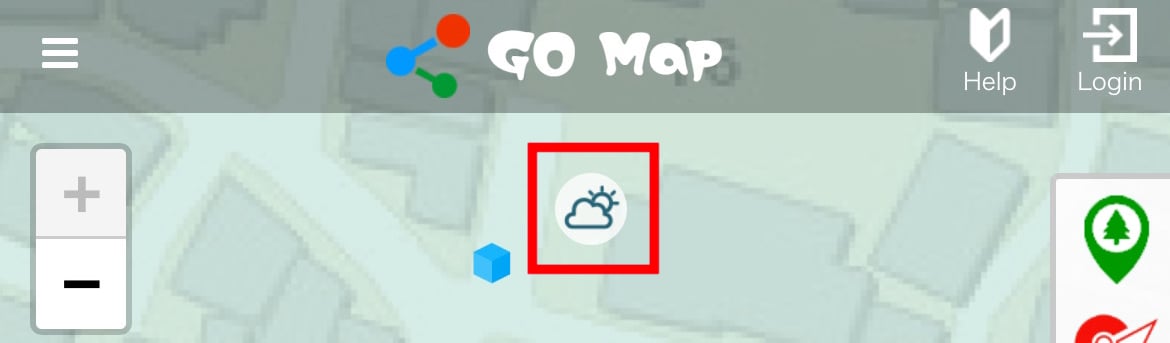
Post Weather Info
To post weather info, center the map on the location you want to post for, tap the “Weather Icon” (if not registered, it will show a “?” mark), and select the current in-game weather.